Create, Customize,
& Print with Ease!
Print Templates
0
Business Card Templates
- File Formats: AI, EPS, PDF, PNG, and JPEG (300 DPI).
- Pre-Press Process: Ensure the design has a 1/8-inch bleed and critical information is within a safe zone. Business card designs should include vector artwork for text and logos. Use CMYK color mode for accurate color reproduction.
- Post-Print Process: After printing, cards are cut to size and checked for alignment. Some business cards may be laminated or have a special finish like embossing or foil stamping for a premium look.
0
Brochure Templates
- File Formats: AI, EPS, PDF, PNG, and JPEG (300 DPI).
- Pre-Press Process: Design should be set up with fold lines and bleed for a clean final product. Use vector graphics for logos and text, and ensure images are high resolution for sharpness.
- Post-Print Process: After printing, brochures are folded, checked for quality, and packaged. Lamination may be added for a polished, long-lasting finish.
0
Postcard Templates
- File Formats: AI, EPS, PDF, PNG, and JPEG (300 DPI).
- Pre-Press Process: Postcard designs should include a 1/8-inch bleed and a safe zone for critical information. Use high-resolution images and vector graphics for logos and text. Ensure colors are CMYK for accurate print reproduction.
- Post-Print Process: After printing, postcards are cut to size and checked for alignment and color consistency. They may also be coated with a gloss or matte finish for enhanced durability and aesthetic appeal.
0
Lables & Sticker Templates
- File Formats: AI, EPS, PDF, PNG, and JPEG (at least 300 DPI).
- Pre-Press Process: Ensure designs have a bleed area of about 1/8 inch. Use vector-based artwork for logos and text for sharp details. For stickers, it’s important to have clean outlines around the design.
- Post-Print Process: After printing, labels and stickers are cut using a die-cut or contour cutting machine. Some may have a protective laminate applied to ensure durability, particularly for outdoor or product-use purposes.
0
Tee-Shirt Templates
- File Formats: AI, EPS, PDF, PNG, and JPEG (300 DPI).
- Pre-Press Process: Artwork should fit within the printable area on the t-shirt and consider the fabric type. Use vector artwork for logos and sharp lines, and high-resolution images for graphics. CMYK color mode is ideal for accurate color reproduction.
- Post-Print Process: Screen printing or direct-to-garment (DTG) printing is used, followed by curing the design to set the ink. Shirts are checked for alignment and print quality before packaging.
0
Hat Templates
- File Formats: AI, EPS, PDF, PNG, and JPEG (300 DPI).
- Pre-Press Process: Use vector files for logos and text. Design should fit the dimensions of the cap’s front panel, with consideration for stitching and seam placement. Ensure proper use of colors and image clarity.
- Post-Print Process: Hat designs are applied through embroidery, screen printing, or heat transfer. The hat is then assembled, with the design positioned on the front panel. Any excess materials or misaligned stitching are corrected before packaging.
0
Flag Templates
- File Formats: AI, EPS, PDF, PNG, and JPEG (300 DPI for print, 150 DPI for large flags).
- Pre-Press Process: Ensure artwork is sized to match the flag’s dimensions and allows for necessary bleed. Use vector graphics for logos and text for sharpness and clarity. Consider how the flag will be displayed when designing (e.g., text orientation).
- Post-Print Process: Flags are printed using dye-sublimation or UV printing and then sewn or finished with grommets, pole pockets, or ropes. A protective coating may be added to enhance durability against the elements.
0
Canvas Tempalates
- File Formats: AI, EPS, PDF, PNG, and TIFF (300 DPI).
- Pre-Press Process: Use high-quality images for the best possible output, ensuring colors are in CMYK mode for print accuracy. Ensure the design has sufficient bleed to wrap around the frame.
- Post-Print Process: After printing, canvases are stretched over wooden frames. If applicable, a protective coating is added to preserve the image and prevent fading. Final inspection ensures that the image is centered and aligned.
0
Bag Templates
- File Formats: AI, EPS, PDF, PNG, and JPEG (300 DPI).
- Pre-Press Process: Ensure that the artwork fits within the designated print area, considering the stitching and seams. Use vector graphics for logos and high-quality images for artwork.
- Post-Print Process: Bags are printed using screen printing or heat transfer methods, then sewn and assembled. Any excess ink or debris is removed, and bags are checked for correct alignment and quality before packing.
0
Bottle and Mug Templates
- File Formats: AI, EPS, PDF, PNG, and JPEG (at least 300 DPI).
- Pre-Press Process: Design should be wrap-around with proper alignment for cylindrical printing. Ensure to account for handle placements on mugs and curved areas for bottles. Vector formats work best for logos, while high-res raster images can be used for artwork.
- Post-Print Process: The design is transferred using sublimation or screen printing. Mugs and bottles are then heat-pressed, which bonds the design to the material. Any excess ink or residue is cleaned off, and products are inspected for quality.
0
Signs and Banner Templates
- File Formats: AI, EPS, PDF, SVG, and high-res JPEG/PNG (300 DPI for banners, 150 DPI for larger signs).
- Pre-Press Process: Design with bleed (at least 2 inches) and safe zone. Use CMYK color mode and vector graphics for crisp lines and logos. Make sure the text and logos are readable from a distance.
- Post-Print Process: After printing, signs and banners are often reinforced with grommets or pole pockets, depending on the display method. A protective laminate may be applied for durability, especially for outdoor use.
0
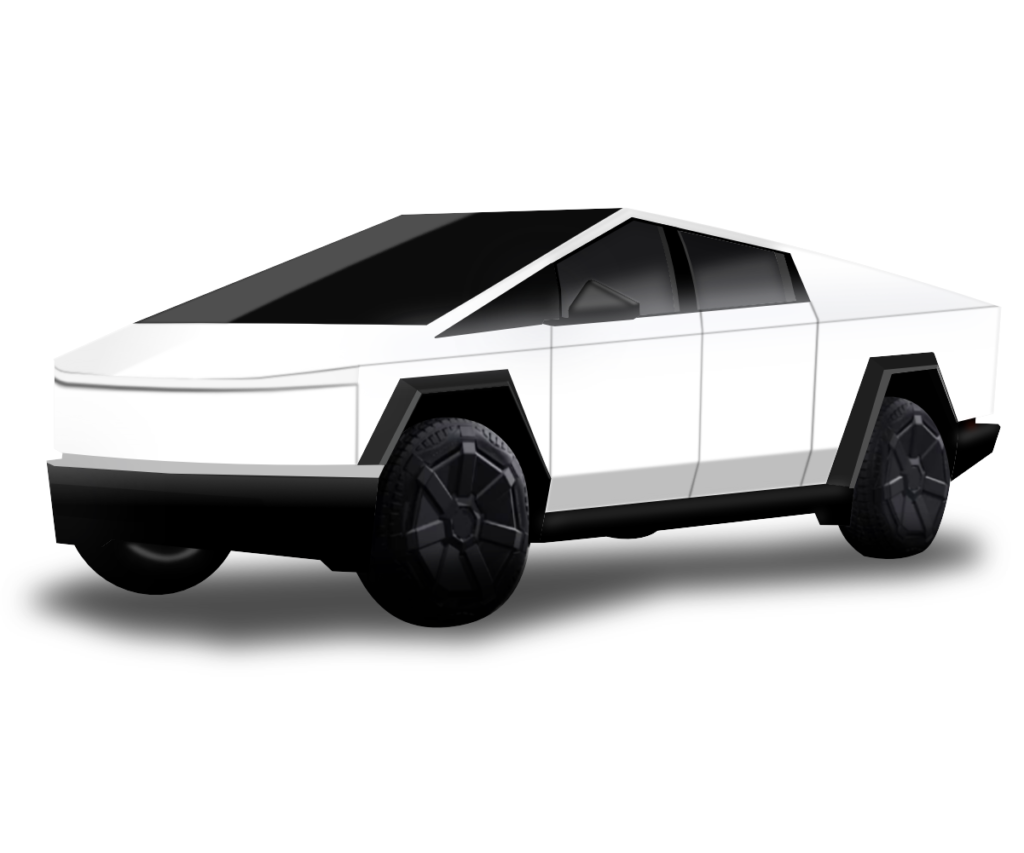
Vehicle Graphic Templates
- File Formats: AI, EPS, PDF, SVG, and high-res PNG/JPEG (at least 300 DPI).
- Pre-Press Process: Ensure artwork is vector-based for scalability. Set up the design with proper bleed (1/8 inch) and safe zone (at least 1/4 inch from edges). Account for vehicle contours in the design, and ensure the colors are CMYK for accurate printing.
- Post-Print Process: After printing, vehicle graphics are laminated for protection against UV rays, dirt, and scratches. The graphics are then cut to size and carefully applied to the vehicle with heat or pressure to ensure durability.
0
Laser Cut Products Templates
- File Formats: AI, EPS, PDF, SVG (vector-based files are ideal), PNG (only if the design is very simple and outlines are clear).
- Pre-Press Process: Ensure the design is created as vector art with clear, clean lines, and no overlapping paths. Use a consistent stroke width to define cuts clearly (0.001” to 0.003”). Ensure that the artwork is fully aligned and scaled to the correct size before sending it for cutting.
- Cutting Information: Laser cutting relies on the precise definition of paths in the vector file. Avoid gradients, shadows, and raster images in the artwork. Make sure that the design elements are well-spaced and do not touch the edges or interfere with each other during the cutting process. Include a margin (at least 1/8 inch) around the design for a clean cut. The laser cutter uses a focused laser beam to vaporize material, so it’s important that the material’s thickness and cutting depth are clearly indicated.
- Post-Print Process: After the cutting process, the edges of the cut pieces will be slightly charred, depending on the material used. These edges can be cleaned using a fine abrasive or polishing process. Products are then inspected for quality, including precision of the cuts, and any residual burn marks or material residues are cleaned off.
0
CNC Cut Products Templates
- File Formats: AI, EPS, DXF (preferred for CNC), SVG, PDF (if using vector artwork), PNG/JPEG (only for reference or simple designs).
- Pre-Press Process: Designs should be created in vector format to ensure precision. If using complex designs, the paths must be clean, and each element should be separated into layers for the CNC machine to handle different cutting or engraving tasks. Ensure that the artwork is properly sized to the desired final product and that the material thickness is considered when designing.
- Cutting Information: CNC cutting requires well-defined paths, and the file should include details about the cutting tool to be used (e.g., bit size, cutting depth). The design should account for the type of material being cut, with clear instructions on the depth of cuts for engraving or cutting through material. A tolerance of ±0.1mm is usually acceptable, but this can vary depending on the machine and material.
- Post-Print Process: Once CNC cutting is completed, the product may require deburring to remove any sharp edges or chips. If the product is being engraved, the design is cleaned and polished to remove any residual dust or debris. The final piece may also be painted or coated depending on the material for additional protection.
0
Customers Adding Finishing Services
-
File Formats: AI, EPS, PDF (vector files preferred for all finishing services).
-
Pre-Press Process: Make sure your artwork is set up with the correct bleed, safe zones, and is optimized for the specific finishing service requested. If using spot colors, make sure they are defined in your artwork for processes like foil stamping, embossing, or varnishing.
-
Types of Finishing Services:
- Lamination: Protects the print by applying a glossy or matte coating to enhance durability and finish. Ensure the artwork file is set with the necessary bleed, and avoid placing critical elements too close to the edges.
- Foil Stamping: Used for high-impact designs, where a metallic or special color foil is applied to the surface. Prepare your design to specify areas to be foiled, and separate these areas as spot colors in your file. Ensure all foiling areas are clearly outlined.
- Embossing/Debossing: Raised or recessed areas on the print. Artwork for embossing or debossing should include the design element as a separate layer and clearly indicate the areas where this effect is to be applied.
- Die Cutting: Custom shapes are cut from the printed material. Ensure the file includes a die-cut line (usually in a distinct color such as red) to indicate the shape to be cut. Provide a margin around the design for smooth cutting and avoid small text or elements near the cut lines.
- Spot UV Coating: A glossy coating applied to specific areas of the print, typically on matte finishes. Define the areas to be treated with a spot UV layer in your artwork, separating them from the main design as a separate layer or spot color.
- Binding and Folding: For brochures, catalogs, or booklets. Specify folding types (e.g., tri-fold, Z-fold) and binding methods (e.g., saddle stitch, perfect binding) in your file. Make sure that your fold lines and binding margins are clearly marked in the artwork.
-
Post-Print Process: Once the finishing services are applied, the products are carefully inspected for the precision of the finishes. For lamination, products are checked for any bubbling or wrinkling. For embossing/debossing and foil stamping, attention is given to the crispness of the design and alignment. Products are trimmed, folded, or bound according to the finishing details, and the final product is packaged for delivery.
0
3D Print Products Templates
-
-
File Formats: STL, OBJ, 3MF (these are the most commonly used 3D model file formats for 3D printing), STEP, IGES (for CAD models).
-
Pre-Press Process:
- Model Preparation: 3D models should be designed with consideration for printability. Ensure that your design does not have non-manifold edges, holes, or overlapping surfaces. For complex designs, consider breaking them into smaller components to optimize printing.
- Scaling and Orientation: Ensure your model is correctly scaled to the desired size and oriented to minimize support material and maximize structural integrity. The orientation will also impact the strength and finish of the final print.
- Wall Thickness: Pay attention to the wall thickness of the design. Thin walls may not be printable or may lead to weak structures. Generally, walls should be at least 1mm thick, but this can vary depending on the printer and material used.
- Support Structures: If your design has overhangs or complex geometries, ensure that the 3D model is designed to include or accommodate support structures. Some 3D printing technologies can print without the need for supports, but others will require them to ensure a clean result.
- Material Considerations: Different 3D printing materials (PLA, ABS, PETG, etc.) have different characteristics. Design your model with the specific material’s properties in mind, including temperature resistance, flexibility, and strength.
-
Cutting/Printing Information:
- Layer Height: Specify the desired layer height for your print. A smaller layer height results in a smoother finish but takes longer to print.
- Print Speed: The print speed is important to ensure accuracy and quality. A slower print speed results in higher precision but takes more time.
- Infill Density: This determines how solid your print will be. Higher infill density creates a stronger object but uses more material. Lower infill densities are useful for lightweight structures or when only the outer shell is required to be solid.
- File Size: Ensure that the file size is manageable for the printer’s capabilities. Very large models may need to be sliced into multiple parts, especially if the printer has a size constraint.
- Tolerance: Depending on the printer’s resolution, ensure that your design accommodates for slight variances in printing. Tolerances generally range from ±0.1mm to ±0.2mm, but this can vary by printer and material.
-
Post-Print Process:
- Support Removal: After printing, support structures may need to be removed, which is done carefully to avoid damaging the print. Depending on the material used, supports may be broken away, dissolved in a chemical solution, or peeled off manually.
- Cleaning and Smoothing: Post-processing may involve cleaning up the print to remove any excess material, such as rafts or support remnants. Some prints may need to be smoothed using sandpaper or chemical smoothing (for materials like ABS), especially if the print has noticeable layer lines.
- Assembly: If your design was printed in multiple pieces, post-print assembly may be necessary. This could involve gluing, clipping, or snapping parts together, depending on the design.
- Finishing: Depending on the use case, additional finishing can be done, such as painting, varnishing, or coating the 3D print. For more polished or decorative prints, you may also use specialized techniques like airbrushing or hand painting.
-
Professional Design Services
Our professional design services specialize in creating custom, high-quality visual solutions that reflect your brand’s identity and capture your audience’s attention. From print design to digital graphics, we provide expert consultation and deliver exceptional results tailored to meet your specific needs.🚀
Brand Identity Design
Crafting cohesive brand visuals, including logos, typography, and color schemes, that align with your business values.Print Design Excellence
Designing impactful print materials such as brochures, business cards, and flyers that make a lasting impression.Packaging Design Solutions
Creating innovative packaging that communicates your brand and attracts customers with attention-grabbing designs.Web and UI Design
Designing user-friendly and visually appealing websites and interfaces for seamless online experiences.
Advertising and Promotional Design
Developing creative ads and promotional materials that drive customer engagement and increase brand awareness.Custom Illustration and Artwork
Providing unique, hand-crafted illustrations and digital art to enhance your brand’s personality and storytelling.Social Media and Digital Content Design
Designing eye-catching social media graphics, banners, and posts to boost online presence and engagement.Event and Trade Show Graphics
Creating impactful event branding and trade show displays that attract attention and drive interactions.
Service Highlights
Tailored Solutions for Every Project
No matter the size or scope, our design team is committed to delivering custom solutions that meet your unique needs and exceed expectations. Ready to elevate your business?
Collaborative Approach
We believe in working closely with our clients throughout the design process, ensuring your vision is brought to life with precision and creativity.